You plug a hard drive in, or you open This PC expecting to see your usual drives, and one of them simply isn’t there. Maybe it’s a brand-new internal drive you just installed that Windows refuses to acknowledge. Maybe it’s an external drive that worked yesterday and won’t show up today. Maybe Windows shows it in Disk Management but File Explorer doesn’t list it. Maybe it shows in BIOS but doesn’t exist anywhere inside Windows. Each of these is a different problem with a different fix — and applying the wrong fix to the wrong scenario is the most common way recoverable data becomes unrecoverable.
This guide walks through the diagnostic flow in order. We’ll figure out exactly which view is missing the drive, what that specific result means, and what to do (and not do) at each step. The good news: most cases where a hard drive isn’t showing up are software-level problems, and the data is fine. The bad news: a meaningful subset are hardware problems where the wrong DIY step can destroy data that was otherwise fully recoverable.
Using a laptop? The diagnostic steps for a drive that won’t show up on a desktop are different from the ones for a laptop. If your laptop can’t find its hard drive — or you’re seeing “no bootable device” or “operating system not found” on startup — see our brand-by-brand guide for Dell, HP, Lenovo, ASUS, Acer, and MSI laptops: Laptop Hard Drive Not Detected.
First question: where exactly isn’t the drive showing up?
Windows has three places a drive can be visible — and only one of them is the one most people check. Before doing anything else, find out which of these three views actually see the drive.
BIOS / UEFI. Before Windows ever loads, your computer’s firmware performs a hardware inventory. To check, restart and press the BIOS key during boot (Del or F2 on most desktops, F2 or Esc on most laptops). Look for a section labeled “Storage,” “Drives,” or “Main.” Every connected drive should be listed by model and capacity.
Disk Management. Inside Windows, press Windows + X and choose “Disk Management” (or search “diskmgmt.msc” in Start). This is the low-level Windows view of all storage hardware, including drives that don’t have drive letters yet, drives without valid partitions, drives that are unallocated, and drives that Windows can see but doesn’t know what to do with.
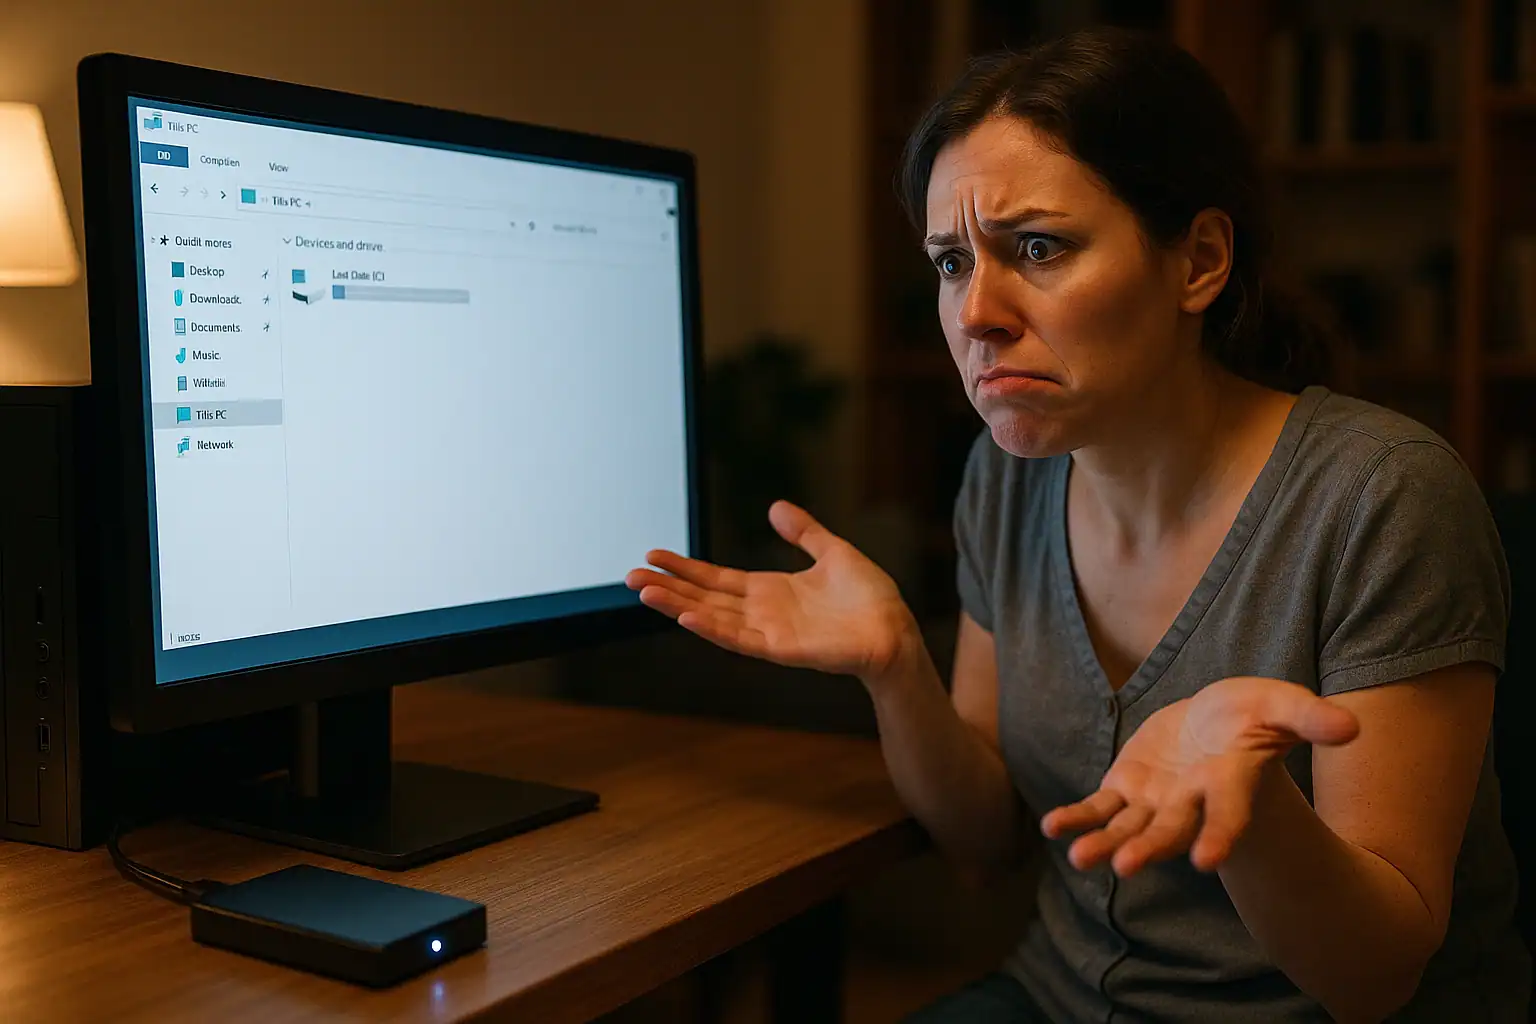
File Explorer (This PC). The standard “My Computer” / “This PC” view. This is the view most users mean when they say a drive “isn’t showing up” — but it’s the most filtered of the three. A drive can be physically present, electrically alive, recognized by BIOS, and even visible in Disk Management, while still not appearing in File Explorer because of something as simple as a missing drive letter.
Check all three. The combination of which views see the drive and which don’t is the most useful diagnostic you can do without any tools at all.
Result 1: drive shows in Disk Management but not in This PC
This is the most common scenario, and almost always the easiest to fix. The drive is fully alive — Windows can see it at the hardware level — but it’s not being mounted into File Explorer as a usable volume. Common causes:
- The drive has no drive letter assigned. Right-click the drive in Disk Management and choose “Change Drive Letter and Paths.” Assign a letter (E, F, G — anything not already in use). The drive should appear in File Explorer immediately.
- The partition shows as RAW. The drive’s file system has been corrupted to the point where Windows doesn’t recognize it. The data is usually still there but unreadable to standard tools. Do not format the drive when Windows offers to. See our guide on RAW drive recovery for what to do instead.
- The drive shows as “Unallocated.” The partition table itself is damaged or missing. The drive looks empty to Windows, but the actual file data is almost always still present underneath. Do not create a new partition or initialize the drive — both are write operations that overwrite the partition information needed for recovery.
- The drive shows as “Not Initialized.” Windows is asking you to initialize the disk before using it. If this is an existing drive that previously held data, do not click “OK” or “Initialize Disk” — that overwrites the first sectors of the drive where the partition table lives. Initialization is for brand-new drives only; on a drive that had your files yesterday, it destroys the very metadata recovery depends on.
Result 2: drive shows in BIOS but not in Disk Management
This is a more serious diagnosis. The hardware is alive — the firmware sees it — but Windows itself can’t enumerate it. Common causes:
- Missing or corrupted disk driver. Open Device Manager (Windows + X → Device Manager) and look under “Disk drives.” A drive with a yellow exclamation mark indicates a driver problem. Right-click → Uninstall Device, then restart. Windows will typically reinstall the driver automatically.
- The drive is failing at the firmware level. Some drives can identify themselves to BIOS (the basic IDENTIFY command works) but can’t respond to Windows’s more complex requests. This points to controller or firmware degradation on the drive itself — early-stage hardware failure that won’t get better on its own.
- Storage controller mode mismatch. If you recently changed the storage controller mode in BIOS (AHCI / IDE / RAID), Windows may have lost the ability to talk to drives that worked under the previous mode. Boot into Safe Mode, then restart normally — this often forces Windows to reload the correct drivers.
- The drive has bad sectors at critical locations. If the bad sectors fall on the parts of the drive Windows reads during enumeration, the drive can be detected but not usable. The data on the rest of the drive is typically still recoverable, but the drive itself is on borrowed time.
Result 3: drive doesn’t show in BIOS at all
This is the most serious of the three. The firmware can’t see the drive. Either the drive is dead, the cable or power connector is bad, or the drive has gone into a fully unresponsive state. Common causes:
- Loose or failed SATA cable / power cable. On a desktop, swap the SATA data cable for a known-good one and try a different SATA power connector from the PSU. This is the cheapest possible test and resolves a meaningful percentage of cases.
- Failed drive controller board (HDD). The small printed circuit board on the bottom of a mechanical hard drive can be damaged by power surges, leaking capacitors, or simple age. The platters inside are fine, but the drive’s brain is gone — it can’t respond to any commands at all.
- Failed NVMe SSD controller. If your drive is an M.2 NVMe SSD, the controller chip that manages the flash storage can fail outright. When it does, the entire drive vanishes from BIOS — no model number, no capacity, nothing. The NAND chips holding your data are usually intact, but they’re unreachable without the controller.
- Mechanical hard drive failure. Stuck spindle motor, seized heads, head crash. Sometimes accompanied by clicking, beeping, or grinding sounds (see our guide on signs of hard drive failure). Sometimes silent. Either way, the drive is mechanically failed and needs cleanroom-level work to recover the data.
Specific scenario: a brand-new hard drive isn’t showing up
If you just installed a new internal hard drive or SSD and it isn’t appearing, the diagnostic flow is shorter and the stakes are lower (no data on it yet to lose). The most common causes:
- The drive needs to be initialized. Open Disk Management. A new drive will typically appear there marked as “Unknown” or “Not Initialized.” Right-click and choose “Initialize Disk.” Choose GPT for any modern drive (legacy MBR has a 2 TB limit and is only needed for very old systems). After initializing, right-click the unallocated space → “New Simple Volume” → assign a drive letter and format.
- The drive isn’t connected properly. Reseat the SATA cable on both ends, or for M.2 drives, reseat the drive in the slot and ensure the retention screw is in place.
- The SATA port is disabled in BIOS. Some motherboards disable SATA ports by default until needed. Check your BIOS’s storage configuration and confirm the port the drive is plugged into is enabled.
- The drive is dead-on-arrival. Rare but real — sometimes new drives fail in shipping. If the drive doesn’t appear in BIOS even after a cable swap, return it under warranty.
Important: the steps above are for a brand-new drive that has never held data. Never initialize or format an existing drive that previously held files — that destroys the partition metadata recovery depends on.
Specific scenario: external hard drive not showing up
External drives have their own failure modes. Before assuming the worst, work through these in order:
- Try a different USB port and cable. USB-C and USB-A cables can develop intermittent connection issues, and front-panel USB ports on desktops are often lower-quality than the rear ports plugged directly into the motherboard. Use a rear port and a known-good cable.
- Test on a different computer. If the drive doesn’t appear on a second machine either, the problem is with the drive or its enclosure. If it shows up fine on the second machine, the problem is on the original computer (driver, port, USB hub, or power).
- Listen for the drive spinning up. On 3.5″ external drives with a separate AC adapter, you should hear the drive spin and feel the case vibrate slightly. No sound and no vibration means the drive isn’t getting power — check the adapter and try a different outlet.
- Check Disk Management even if File Explorer doesn’t show it. External drives that have been incorrectly ejected or that have file system corruption sometimes show up in Disk Management as “RAW” or with no drive letter, even when File Explorer is empty.
For specific failure modes on the most common external drive lines, see our guides on WD My Passport recovery and external hard drive not showing up.
Windows 10 and Windows 11: a few version-specific scenarios
Newer versions of Windows have introduced a few scenarios that can cause drives to vanish even when nothing is physically wrong:
Fast Startup hiding drives across reboots. Windows 10 and 11 have Fast Startup enabled by default, which uses a hybrid hibernation rather than a true shutdown. On some configurations, this leaves drives in an inconsistent state across reboots. Try a true shutdown: hold Shift while clicking the Shutdown button in the Start menu. Then power on normally.
USB Selective Suspend disconnecting external drives. Windows can put USB devices to sleep to save power, and sometimes drives don’t wake back up cleanly. Open Control Panel → Power Options → Change plan settings → Change advanced power settings → USB settings → USB selective suspend setting → set to Disabled.
Storage Sense and drive optimization conflicts. On some Windows 11 builds, Storage Sense aggressively offloads external drives and can fail to remount them. Settings → System → Storage → Storage Sense → review what’s been configured.
BitLocker on an external drive that lost its key. If you encrypted an external drive with BitLocker on a different computer, the new computer may not have the recovery key and Windows can refuse to show the drive until the key is provided. Check Disk Management — a BitLocker-encrypted drive will show as a normal partition labeled “BitLocker encrypted.” See our guide on BitLocker recovery if you don’t have the recovery key.
What not to do if the data on the drive matters
The fastest way to turn a recoverable situation into an unrecoverable one is applying the wrong fix to a drive that holds data you can’t afford to lose. Specifically:
- Don’t accept “Initialize Disk” prompts on an existing drive. Initialization writes a new, empty partition table over the existing one.
- Don’t accept “Format” prompts on a drive that previously held data. Formatting is a write operation that overwrites the file system structures recovery depends on.
- Don’t run CHKDSK on a drive that’s failing. CHKDSK is designed for healthy drives with file system errors. On a drive that’s developing bad sectors or has hardware problems, CHKDSK can write changes that finish off marginal data.
- Don’t repeatedly power-cycle a drive that’s making clicking or grinding noises. Each spin-up risks the heads contacting the platter surface and destroying data permanently.
- Don’t open the drive yourself. The platters inside a hard drive are precision-engineered to nanometer tolerances. A single dust particle on the wrong spot can destroy data permanently.
- Don’t put the drive in the freezer. This is a decades-old myth that has destroyed more drives than it has ever saved. Condensation when the drive warms back up can short out the controller board.
When professional recovery is the right call
If your drive doesn’t appear in BIOS, if it’s making unusual noises, if Windows is offering to initialize or format a drive that previously held data, or if you’ve already tried the basic troubleshooting steps and the drive still isn’t accessible — and the data on it matters — the safest move is to stop and have the drive evaluated rather than risk doing more damage.
Professional hard drive recovery starts with a non-powered inspection, followed by drive imaging using hardware that can work with drives a regular computer can’t. For mechanical drives, this can involve replacing the controller board, the read/write heads, or other components with donor parts in a cleanroom environment. For SSDs with failed controllers, it can involve chip-off work on the NAND flash chips. The original drive is never written to during the process; the data comes off as an image and is delivered on a separate destination drive.
Gillware offers a free, no-obligation evaluation. The diagnostic identifies the failure mode, scopes the work required, and produces a flat-rate quote. You only pay if we successfully recover your data. If the cost doesn’t make sense for your situation, you can decline and have the drive returned at no charge.
Frequently asked questions
Why is my hard drive not showing up in This PC but visible in Disk Management?
The drive is fine at the hardware level but isn’t being mounted as a usable volume. The most common causes are a missing drive letter (right-click the drive in Disk Management → Change Drive Letter and Paths → Add), a RAW file system (don’t format — see RAW recovery), or an unallocated partition (don’t create a new volume on a drive that previously held data). Each case has a different fix, and the wrong fix can destroy data — start with the simplest (drive letter) and only escalate if that doesn’t work.
Why is my hard drive not showing up in Disk Management?
If Disk Management itself doesn’t see the drive, the problem is below the Windows layer — either a driver issue (check Device Manager for a yellow exclamation), the drive isn’t being detected by BIOS (check BIOS storage section), or the drive is in a failed state where it can’t respond to Windows enumeration. Identifying which of those three categories you’re in determines what to do next.
What does it mean when a hard drive shows up as “Not Initialized” or “Unallocated”?
“Not Initialized” means Windows doesn’t recognize the drive’s partition table. “Unallocated” means Windows sees the drive but can’t find any valid partitions on it. For a brand-new drive, both are normal and you should initialize and format. For a drive that previously held data, neither is normal — the partition table has been damaged or overwritten, and the file data is usually still present underneath. Do not initialize, format, or create a new partition on an existing drive showing either status. Those are write operations that destroy the metadata professional recovery depends on.
My new hard drive isn’t showing up — what’s wrong?
For a brand-new internal drive: open Disk Management, look for the drive listed as “Unknown” or “Not Initialized,” right-click and initialize it (use GPT), then create a new simple volume and format. If the drive doesn’t appear in Disk Management at all, check BIOS to confirm the drive is detected and the SATA port is enabled. If BIOS doesn’t see it either, try a different SATA cable and port — and if it still doesn’t appear, return the drive under warranty.
Why is my external hard drive not showing up on Windows 10 or Windows 11?
The most common causes are: a marginal USB cable (try a known-good cable), a low-power front-panel USB port (try a rear port directly on the motherboard), a USB Selective Suspend setting that’s putting the drive to sleep and not waking it correctly (disable in Power Options), or file system corruption that has the drive showing in Disk Management but not File Explorer. If the drive doesn’t appear on a second computer either, the problem is in the drive itself rather than the original PC.
My hard drive shows in BIOS but Windows won’t see it. What do I do?
Open Device Manager and look under “Disk drives” for any yellow warning icons — a driver problem is the most common cause. If the device shows no errors but Disk Management doesn’t list the drive, try uninstalling it from Device Manager and restarting (Windows will reinstall the driver). If that doesn’t work, the drive may be failing at the firmware level — it can identify itself to BIOS but can’t respond to Windows’s more complex commands. That’s an early-stage hardware failure and a sign to back up any other drives in the system and have the failing drive professionally evaluated.
Can I recover data from a drive that isn’t showing up?
In most cases, yes. The single biggest factor in whether recovery is possible is whether anything has been written to the drive after the failure. If you’ve initialized, formatted, or run repair tools on a drive that previously held data, recovery becomes much harder. If you’ve left the drive alone and simply can’t access it, recovery is usually possible — through cleanroom work on mechanical drives, chip-off work on SSDs with failed controllers, or software-level reconstruction of the file system on logically corrupted drives.
How do I tell if it’s a software problem or a hardware problem?
The fastest test: does the drive appear in BIOS? If yes, the hardware is at least nominally alive and the problem is software-level (driver, file system, partition table) — usually solvable without specialized equipment. If no, the problem is hardware-level — the drive itself, its connection, or its controller has failed. Hardware problems generally require professional recovery if the data matters.
The bottom line
A hard drive that isn’t showing up is almost always trying to tell you something specific — and finding out exactly which view of the drive is missing it (BIOS, Disk Management, or File Explorer) is the most useful diagnostic step you can take before doing anything else. Most of the time, the problem turns out to be software-level and easily fixable. Some of the time, it’s hardware-level and needs professional attention.
The single most common way recoverable data becomes unrecoverable is accepting a Windows prompt to initialize or format a drive that previously held files. If your drive isn’t showing up and the data on it matters, the rule that protects you the most is: don’t let Windows write anything to the drive until you know what you’re actually dealing with.
If you’re looking at a drive that isn’t showing up and the data on it is important enough that you can’t afford to lose it, Gillware offers a free, no-obligation evaluation — flat-rate quote after inspection, and you only pay if we recover your data.